在亚马逊 EKS 中使用 EFS 持久化数据
Amazon Elastic File System (Amazon EFS)
EKS 中的 Pod 的无状态的,也就是说 Pod 可能被重建,重建过后 Pod 里面的数据会全部丢失。
为了解决 EKS Pod 数据持久换的问题,我们可以选择 Amazon S3 对象存储 或者 Amazon Elastic File System (Amazon EFS) 提供无服务器的完全弹性文件存储。
- S3 做为对象存储,价格便宜使用也比较方便,但需要修改应用的代码。
- EFS 价格相比 S3 贵一些,但使用起来更方便,只需要把 EFS 当成一般硬盘使用即可,不需要修改应用代码。
Amazon EFS Container Storage Interface (CSI)
Amazon EFS Container Storage Interface (CSI) 驱动程序提供了一个 CSI 接口,允许在AWS上运行的 Kubernetes 集群管理 Amazon EFS 文件系统的生命周期。
Amazon EFS CSI 驱动程序支持动态预置和静态预置。目前,动态预置会为每个 PV 创建一个访问点。这意味着必须先在 AWS 上手动创建 Amazon EFS 文件系统,并将其作为存储类参数的输入提供。对于静态预置,需要先在 AWS 上手动创建 Amazon EFS 文件系统。之后,可以使用驱动程序将其作为卷挂载到容器内。
准备条件
- AWS EKS Kubernetes 1.30+
- AWS CLI 2.12.3+
- kubectl 1.30+ 和 eksctl
- 动态预置 需要 1.2 或更高版本的 Amazon EFS Container Storage Interface (CSI) 驱动程序。
- 可以在任何受支持的 Amazon EKS 集群版本上通过 1.1 版本的驱动程序,对持久性卷使用 静态预置
步骤一:使用 eksctl 创建 IAM 策略
Amazon EFS CSI 驱动程序需要 IAM 权限才能与您的文件系统进行交互。创建 IAM 角色并向其附加所需的 AWS 托管策略,要实现此过程,可以使用以下过程之一:
本案例以 eksctl 为例创建 IAM 角色。请将 my-cluster 替换成 EKS 的集群名称:
export cluster_name=my-cluster
export role_name=AmazonEKS_EFS_CSI_DriverRole

eksctl create iamserviceaccount \
    --name efs-csi-controller-sa \
    --namespace kube-system \
    --cluster $cluster_name \
    --role-name $role_name \
    --role-only \
    --attach-policy-arn arn:aws:iam::aws:policy/service-role/AmazonEFSCSIDriverPolicy \
    --approve

TRUST_POLICY=$(aws iam get-role --role-name $role_name --query 'Role.AssumeRolePolicyDocument' | \
    sed -e 's/efs-csi-controller-sa/efs-csi-*/' -e 's/StringEquals/StringLike/')
aws iam update-assume-role-policy --role-name $role_name --policy-document "$TRUST_POLICY"
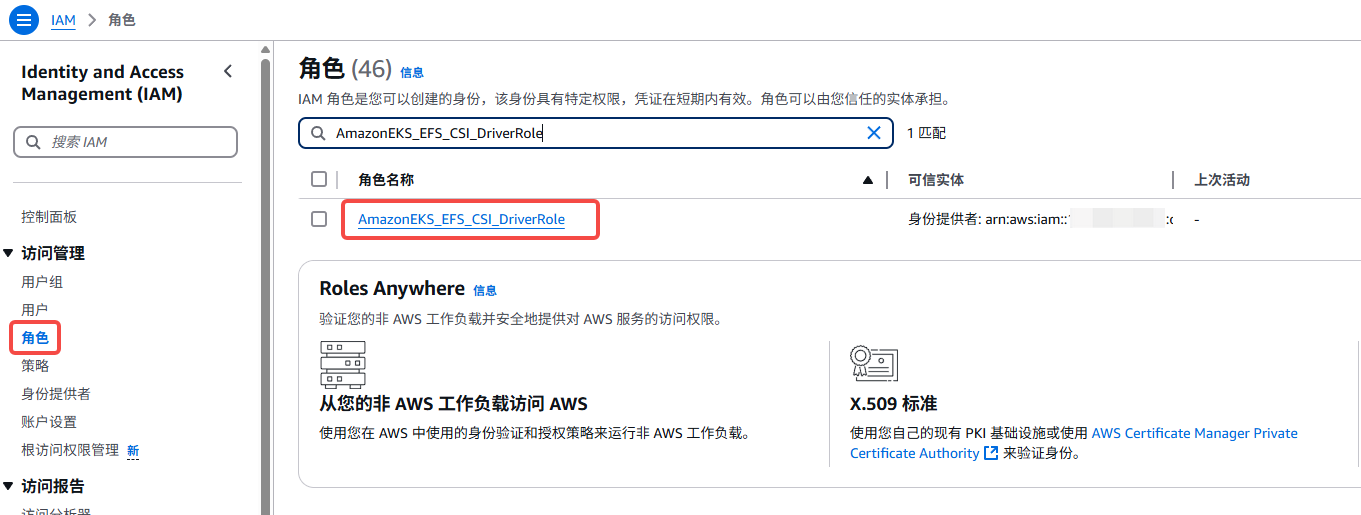
eksctl 命令行创建了以下资源对象:
IAM 角色 AmazonEKS_EFS_CSI_DriverRole
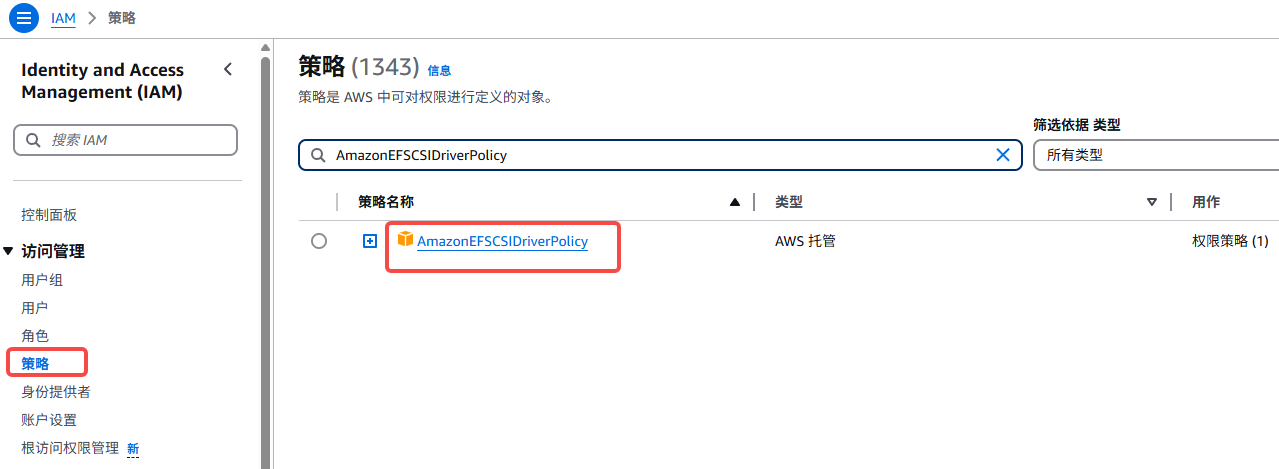
IAM 策略 AmazonEFSCSIDriverPolicy
EKS Serviceaccount efs-csi-controller-sa
$ kubectl get sa -A|grep efs-csi-controller-sa
kube-system                              efs-csi-controller-sa                                0         3d
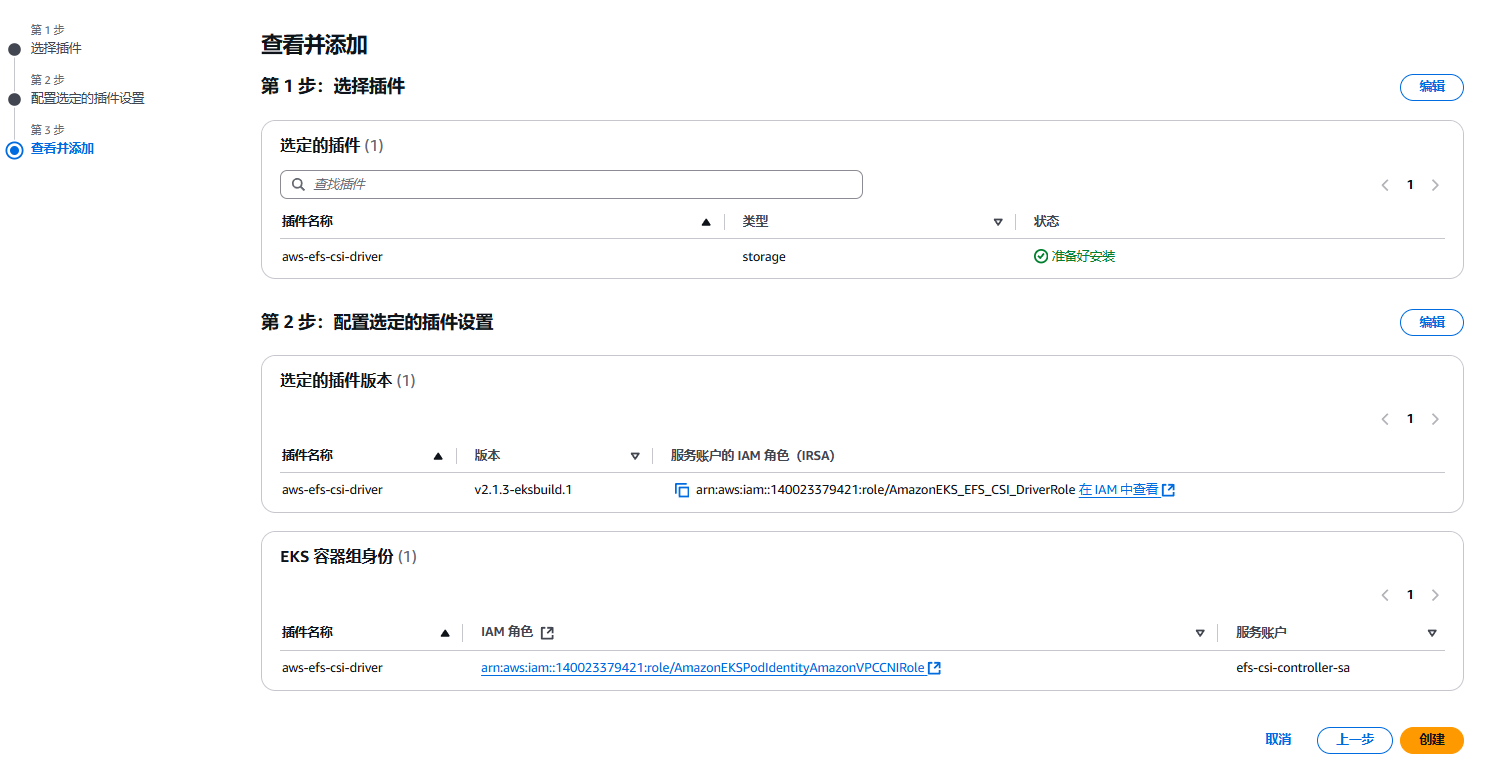
步骤二:EKS 插件安装:Amazon EFS CSI 驱动程序
安装插件前请先查看与 Kubernetes 版本兼容矩阵 Kubernetes Version Compability Matrix
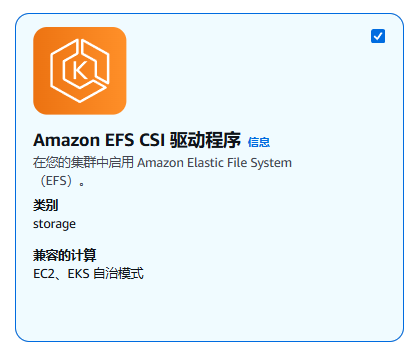
本生产案例,使用的是 v2.1.3-sksbuild.1 版本:
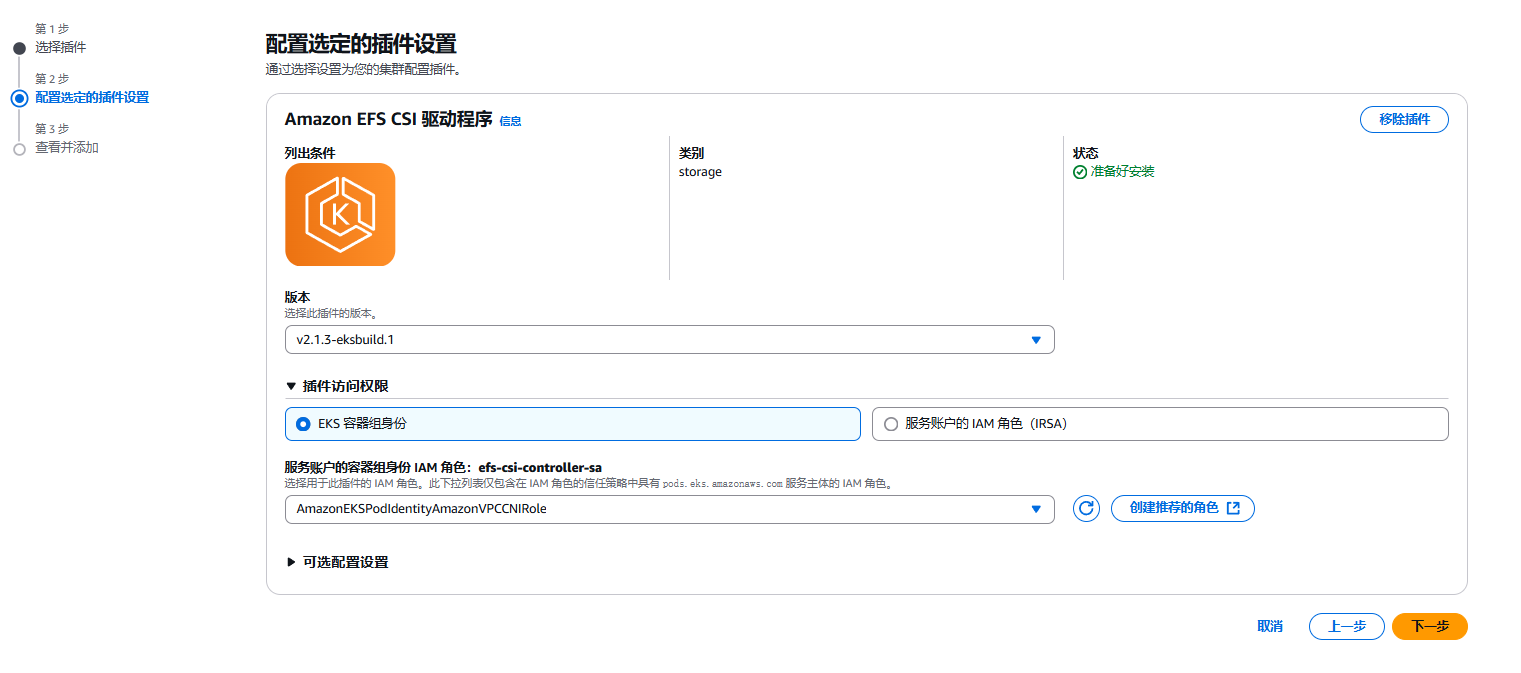
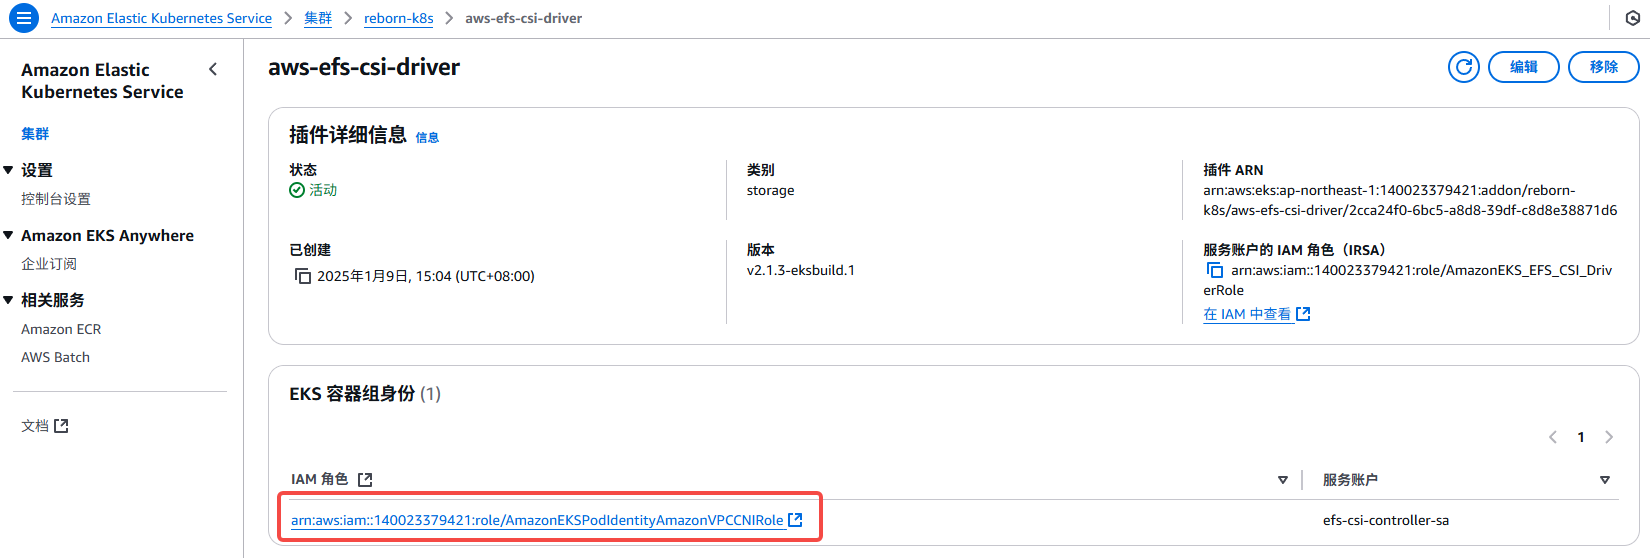
插件容器组授权
在 EKS 组件管理界面,找到 “EKS 容器组身” ,选择其 IAM角色:
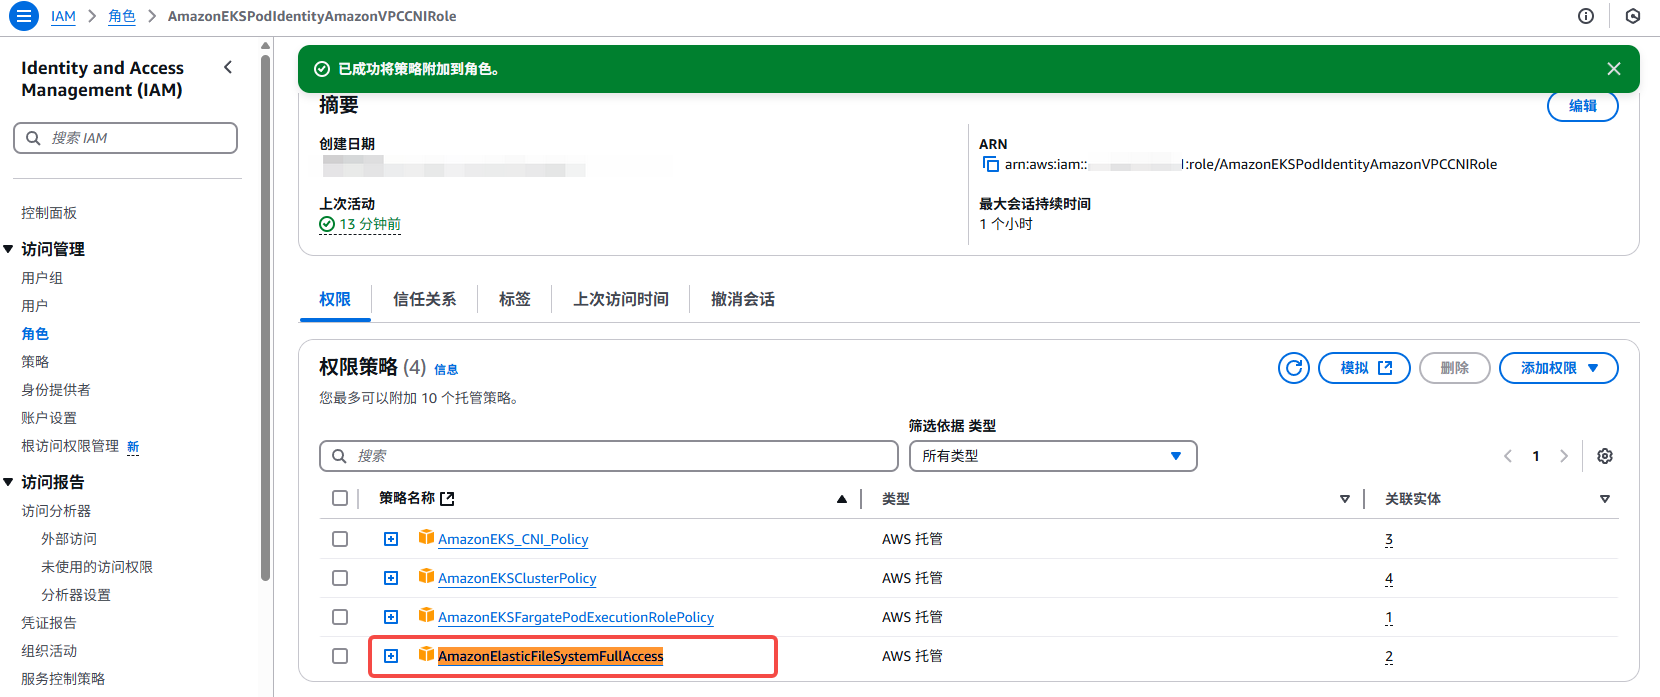
附加权限:AmazonElasticFileSystemFullAccess
步骤三:创建 Amazon EFS 文件系统
要创建 Amazon EFS 文件系统,请参阅 GitHub 上的 efs-create-filesystem
Amazon EFS CSI 驱动程序支持Amazon EFS 接入点,这些接入点是 Amazon EFS 文件系统中特定于应用程序的入口点,可让您更轻松地在多个 Pod 之间共享文件系统。接入点可以强制所有通过接入点发出的文件系统请求的用户身份,并为每个 Pod 强制使用根目录。有关更多信息,请参阅Amazon EFS 接入点。
您必须在同一个终端中完成以下步骤,因为变量是跨步骤设置和使用的。
1.检索集群所在的 VPC ID,并将其存储在变量中以供后续步骤使用。将其替换 my-cluster 为您的集群名称。
vpc_id=$(aws eks describe-cluster \
    --name my-cluster \
    --query "cluster.resourcesVpcConfig.vpcId" \
    --output text)
2.检索集群 VPC 的 CIDR 范围并将其存储在变量中以供后续步骤使用。将其替换 region-code 为您的集群所在的 AWS 区域。
cidr_range=$(aws ec2 describe-vpcs \
    --vpc-ids $vpc_id \
    --query "Vpcs[].CidrBlock" \
    --output text \
    --region region-code)
3.创建一个具有入站规则的安全组,该规则允许您的 Amazon EFS 挂载点的入站 NFS 流量。
3.1 创建安全组。请将 替换example values为您自己的安全组。
security_group_id=$(aws ec2 create-security-group \
    --group-name MyEfsSecurityGroup \
    --description "My EFS security group" \
    --vpc-id $vpc_id \
    --output text)
3.2 创建入站规则,允许来自集群 VPC 的 CIDR 的入站 NFS 流量。
aws ec2 authorize-security-group-ingress \
    --group-id $security_group_id \
    --protocol tcp \
    --port 2049 \
    --cidr $cidr_range
为了进一步限制对文件系统的访问,您可以使用子网的 CIDR 而不是 VPC。
为您的 Amazon EKS 集群创建 Amazon EFS 文件系统
1.创建文件系统。请将其替换 region-code 为您的集群所在的 AWS 区域
file_system_id=$(aws efs create-file-system \
--region region-code \
--performance-mode generalPurpose \
--query 'FileSystemId' \
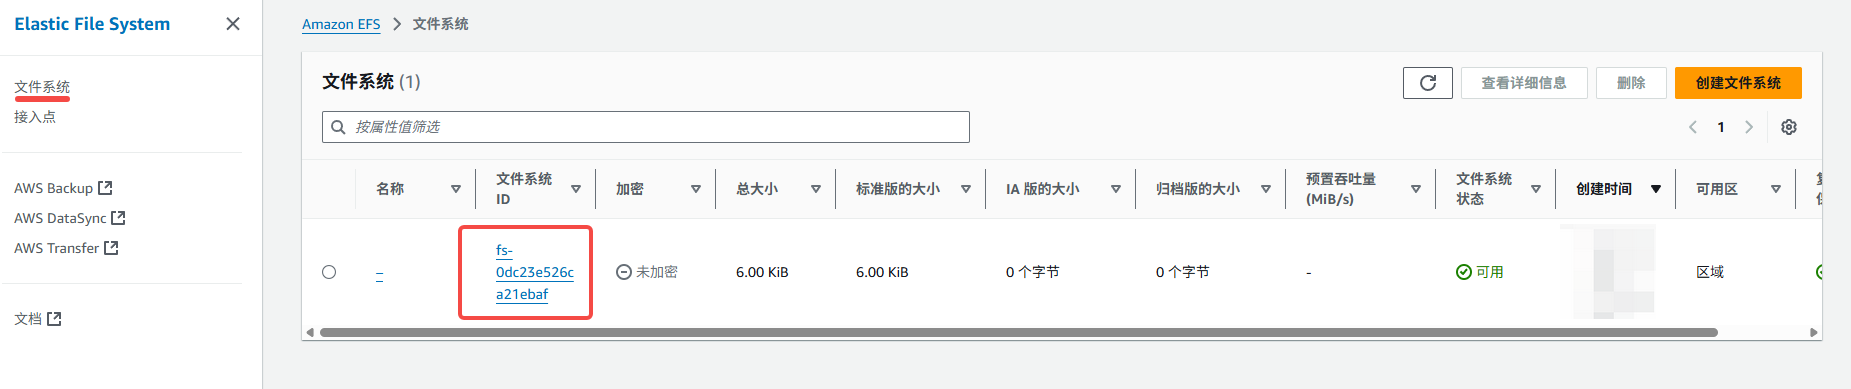
--output text)
在 AWS EFS 控制台,可以看到一个 EFS 实例被创建出来了:
2.创建挂载目标
确定集群节点的 IP 地址
$ kubectl get nodes -o wide
NAME                                               STATUS   ROLES    AGE    VERSION               INTERNAL-IP     EXTERNAL-IP    OS-IMAGE                       KERNEL-VERSION                    CONTAINER-RUNTIME
ip-172-31-23-153.ap-northeast-1.compute.internal   Ready    <none>   2d2h   v1.31.3-eks-59bf375   172.31.23.153   57.183.22.71   Amazon Linux 2023.6.20241212   6.1.119-129.201.amzn2023.x86_64   containerd://1.7.23
ip-172-31-35-162.ap-northeast-1.compute.internal   Ready    <none>   63d    v1.31.3-eks-59bf375   172.31.35.162   18.182.5.249   Amazon Linux 2023.6.20241212   6.1.119-129.201.amzn2023.x86_64   containerd://1.7.23
ip-172-31-6-97.ap-northeast-1.compute.internal     Ready    <none>   63d    v1.31.3-eks-59bf375   172.31.6.97     13.231.225.5   Amazon Linux 2023.6.20241212   6.1.119-129.201.amzn2023.x86_64   containerd://1.7.23
分别对三个 eks node 确定 VPC 中子网的 ID 以及子网所在的可用区:
aws ec2 describe-subnets \
    --filters "Name=vpc-id,Values=$vpc_id" \
    --query 'Subnets[*].{SubnetId: SubnetId,AvailabilityZone: AvailabilityZone,CidrBlock: CidrBlock}' \
    --output table

# 示例输出如下:
--------------------------------------------------------------------
|                          DescribeSubnets                         |
+------------------+------------------+----------------------------+
| AvailabilityZone |    CidrBlock     |         SubnetId           |
+------------------+------------------+----------------------------+
|  ap-northeast-1d |  172.31.16.0/20  |  subnet-00e0e31740ac59107  |    # 得到 SubnetId
|  ap-northeast-1a |  172.31.32.0/20  |  subnet-03c2c73fe9ae71859  |
|  ap-northeast-1c |  172.31.0.0/20   |  subnet-038beb348a9a3ecff  |
+------------------+------------------+----------------------------+
为节点所在的子网添加挂载目标。
从前两个步骤的输出来看,集群中有一个 IP 地址为 的节点 172.31.35.162。该 IP 地址位于 CidrBlockID 为 的子网的内 subnet-03c2c73fe9ae71859。因此,以下命令将为节点所在的子网创建一个挂载目标。
aws efs create-mount-target \
    --file-system-id $file_system_id \
    --subnet-id subnet-03c2c73fe9ae71859 \
    --security-groups $security_group_id
集群中的另外两个节点,位于不同的可用区,也需要创建对应的创建挂载目标:
aws efs create-mount-target \
    --file-system-id $file_system_id \
    --subnet-id subnet-00e0e31740ac59107 \
    --security-groups $security_group_id

aws efs create-mount-target \
    --file-system-id $file_system_id \
    --subnet-id subnet-038beb348a9a3ecff \
    --security-groups $security_group_id
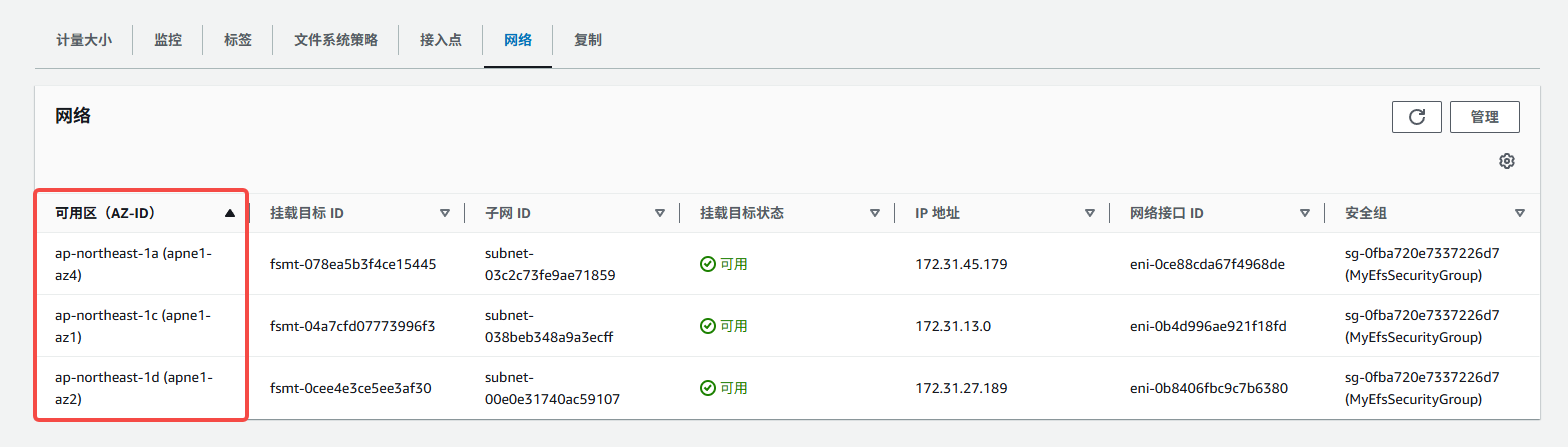
经过以上对子网的绑定,到 AWS EFS 实例下查看结果:
步骤四:eks node 安装 Amazon EFS 客户端
node 安装 EFS 客户端
接下来需要登录 EKS 集群的每一台节点 手动安装 Amazon EFS 客户端
sudo yum install -y amazon-efs-utils
步骤五:部署示例应用程序
动态配置
为 Amazon EFS 创建存储类:
检索您的 Amazon EFS 文件系统 ID
$ aws efs describe-file-systems --query "FileSystems[*].FileSystemId" --output text
fs-0dc23e526ca21ebaf
下载 Amazon EFS 的 StorageClass 清单,将 fileSystemId 改成你实际的 Amazon EFS 文件系统 ID
curl -O https://raw.githubusercontent.com/kubernetes-sigs/aws-efs-csi-driver/master/examples/kubernetes/dynamic_provisioning/specs/storageclass.yaml
$ kubectl apply -f storageclass.yaml

$ kubectl get sc
NAME     PROVISIONER             RECLAIMPOLICY   VOLUMEBINDINGMODE      ALLOWVOLUMEEXPANSION   AGE
efs-sc   efs.csi.aws.com         Delete          Immediate              false                  16h
测试 Pod:
---
apiVersion: v1
kind: PersistentVolumeClaim
metadata:
  name: efs-claim
spec:
  accessModes:
    - ReadWriteMany
  storageClassName: efs-sc
  resources:
    requests:
      storage: 5Gi
---
apiVersion: v1
kind: Pod
metadata:
  name: efs-app
spec:
  containers:
    - name: app
      image: busybox
      command: ["/bin/sh"]
      args: ["-c", "while true; do echo $(date -u) >> /data/out; sleep 5; done"]
      volumeMounts:
        - name: persistent-storage
          mountPath: /data
  volumes:
    - name: persistent-storage
      persistentVolumeClaim:
        claimName: efs-claim
使用文件系统 DNS 名称挂载:
sudo mount -t efs -o tls fs-0dc23e526ca21ebaf.efs.ap-northeast-1.amazonaws.com /data/efs/
清单所提供的存储类 RECLAIMPOLICY=Delete ,而实际经过我的测试,delete pods,pvc ,数据仍然是会保留在 efs 中的:
$ pwd
/data/efs/dynamic_provisioning/default
$ ll
total 8
drwx------. 2 ec2-user ec2-user 6144 Apr 18 03:47 efs-claim-0abffdd6-52b6-4c5e-af9e-cca0780046ed
drwx------. 2 ec2-user ec2-user 6144 Apr 18 03:59 efs-claim-44485360-ab66-4e89-a42c-dd380d71427d